Welcome to mailMonk app help document. Here you will find step by step details on how to use the app. If you have any queries or doubt, you can always get in touch with us.
Table of content:
Install the app and add to board
Go to monday.com marketplace to install the mailMonk app. After clicking on the Install button, you can choose which workspace to add the app. Choose all workspaces or any specific workspace you want.
Once you have installed the app, go to a board. Click on the plus icon next to the main view to add a view. Click on apps. Choose mailMonk from the available options.
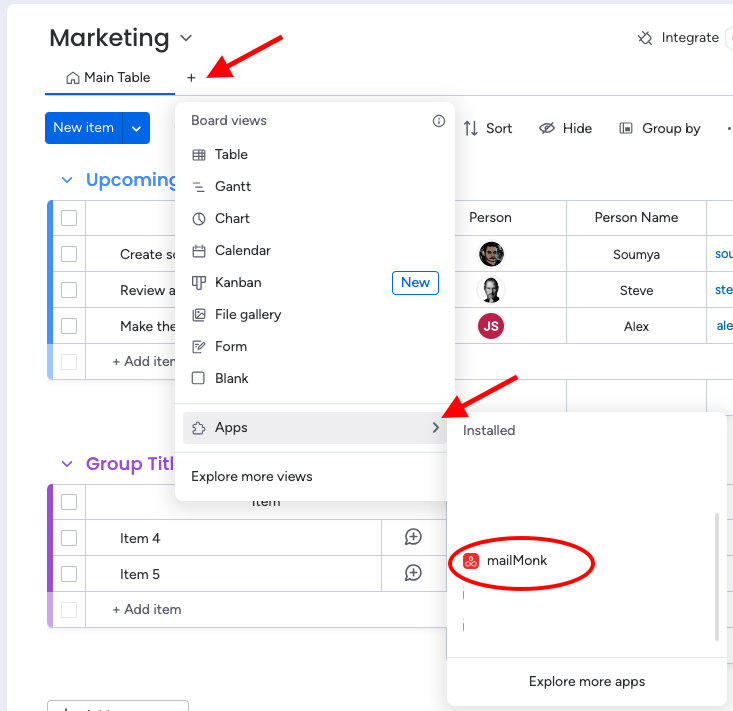
If you have not authorized the app already, it will take you to the monday.com oauth screen to ask for necessery permissions. Once you click on accept, app will redirect you to the start page.
If you have already given the required permissions, you will land on the start page.
Note: Adding outlook email feature is coming soon.
Create or manage email accounts
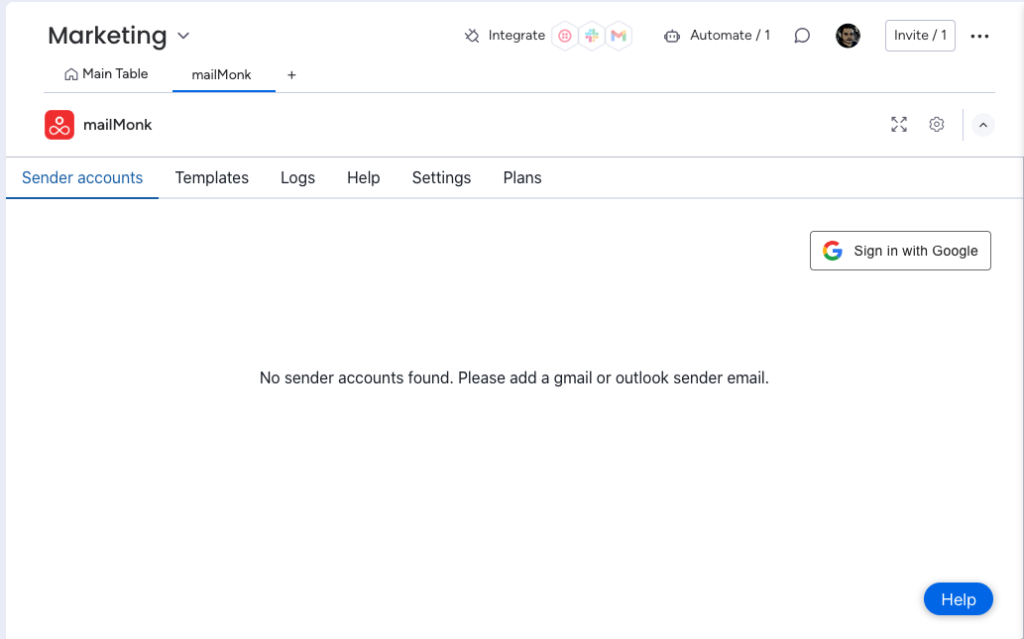
To be able to send emails, you need to add atleast one sender email to mailMonk app. You can add more sender emails to be able to send email from those emails as well.
Lets see how to add a sender email.
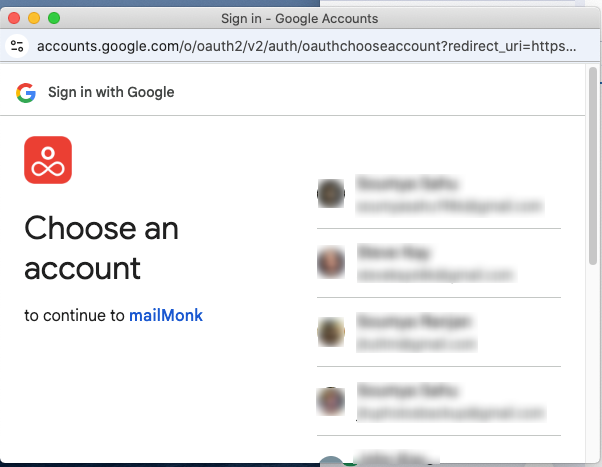
Click on "Sign in with Google" button. This will open the google signin popup.
Select the permission that says "Send email on your behalf".
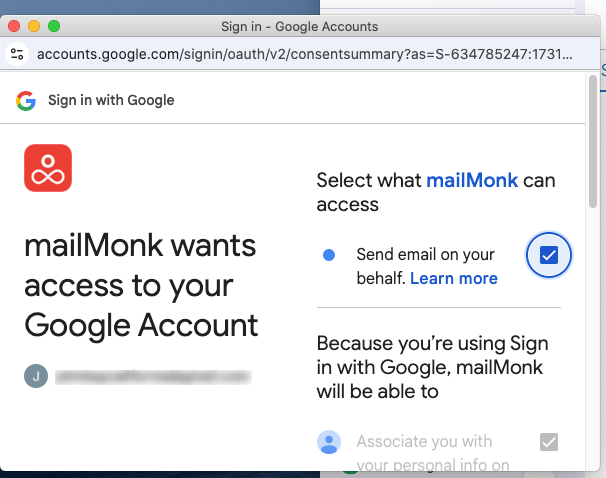
Click ok. Now the email will be added to your mailMonk sender emails list.

You can repeat this process to add more sender emails to your account.
Create template
Lets create a template.
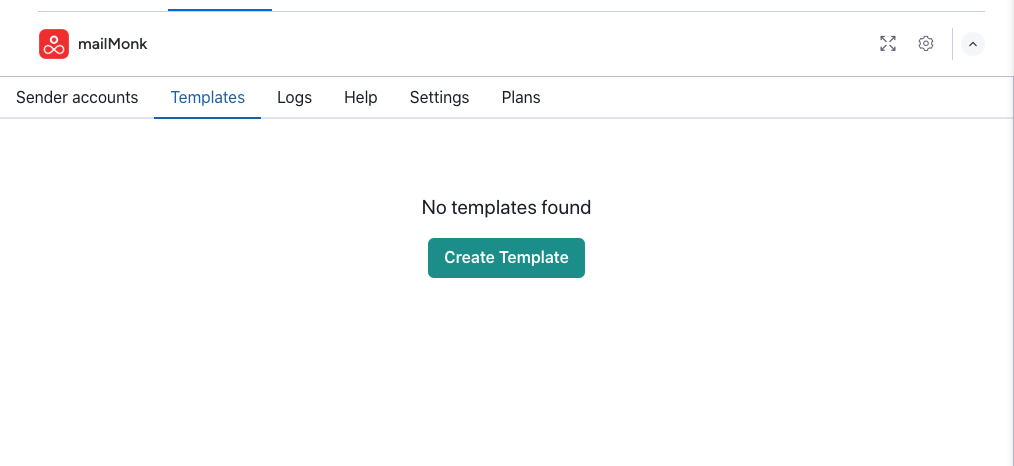
Go to the Templates tab. Click on the "Create template" button.
This will open a popup to ask you to type a template name.
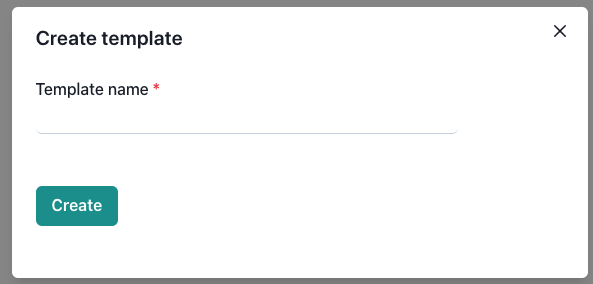
Fill in the template name.
Click on "Create".
This will create a blank template for you and take you to the template edit page.
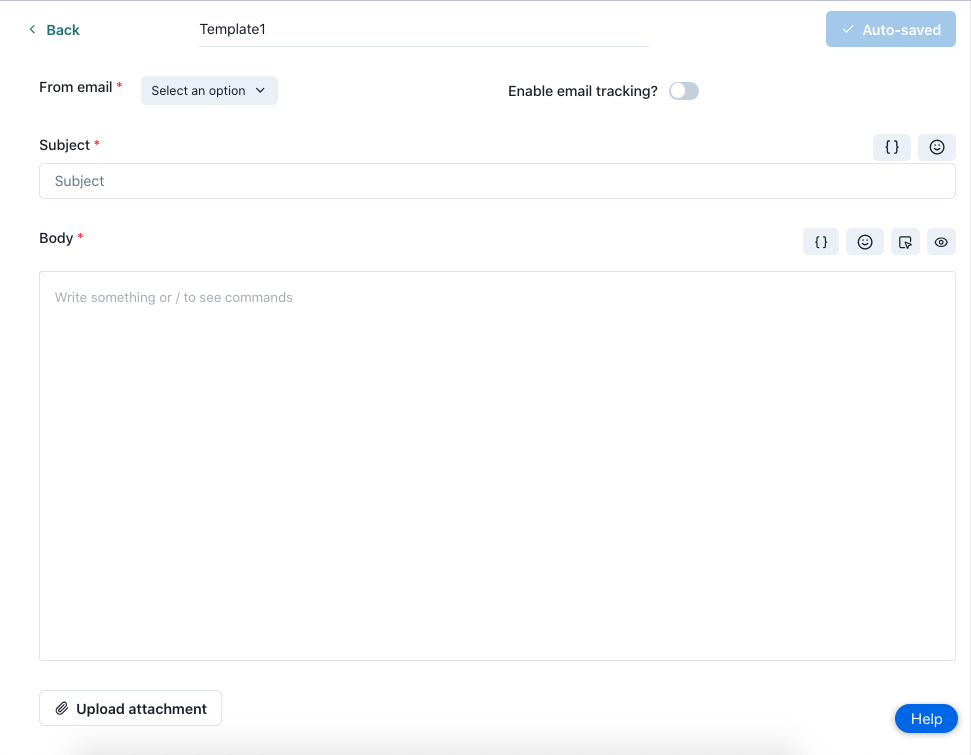
The template editor page will look something like this.
We will explore how to edit template in few moments. But at this point if you click on the "Back" button in edit template page, it will take you to the templates list page.
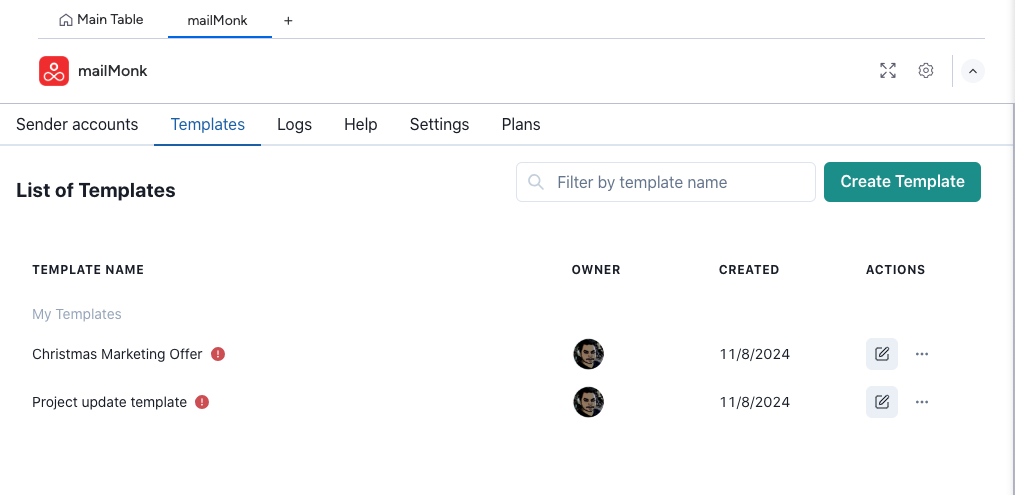
Here you can see the templates that you just created. These are under "My Templates".
If you have other team members using the mailMonk app and they too created templates, then those will also appear here under "Templates by others".
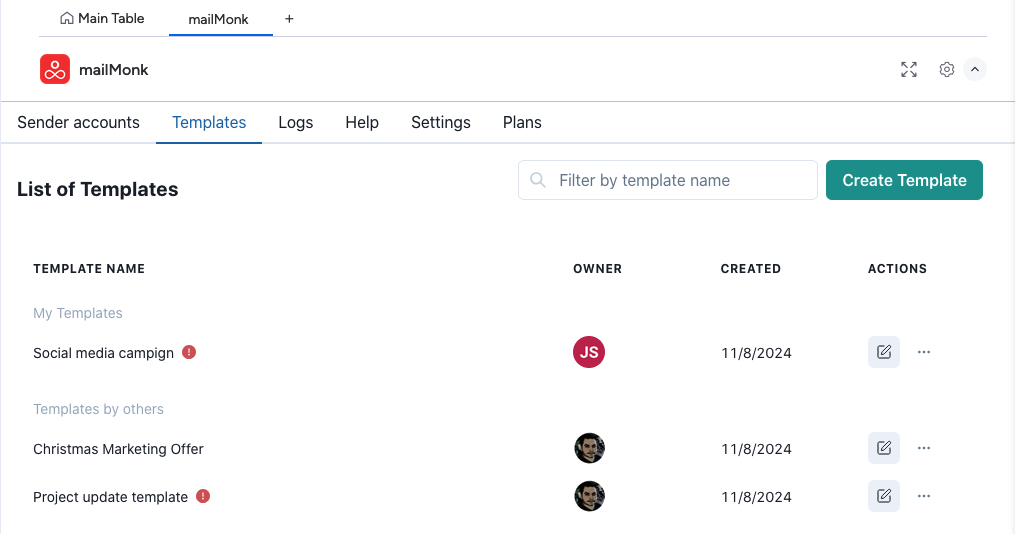
For each template, you can see its name, owner of the template, created date and actions related to the template.
If a template has no sender email set or there is no subject, then you will see a warning sign next to the template name. If you hover on it, you will see the warning message.
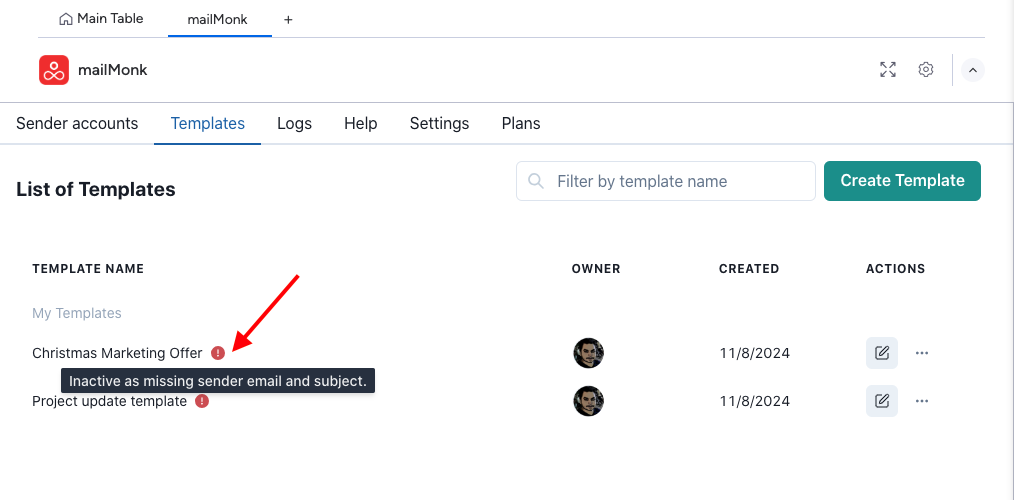
If sender email and subject is not set for the template, then the template will be marked as inactive. Meaning this template will not be available for selection when creating an automation using the recipes.
For each template, few actions are available.
- Edit template – The edit template icon will take you to the edit page. Only owners can edit the template.
- Pin template – To pin the template to top of the list for you only.
- Duplicate template – This will duplicate the template. Only template design is being duplicated here.
-
Transfer ownership – Clicking on this will open a popup and it will ask you to choose a user to transfer this template.
Note: You can only select users from your organization who are using mailMonk app and are current board subscribers. If they are current board subscribers but have not used mailMonk app, please ask them to use mailMonk app by clicking on the mailMonk board view from their logged in monday user account.
- Delete template – This will delete the template. Only owner of the template can delete a template.
Edit template
Let go through each of the input fields here.
- Template Name – You can edit the template name here.
- From email – You can select the sender email that you want to use with this template. When emails will be sent via monday board automation triggers, the email will be sent from this email address.
- Enable email tracking – To enable tracking of the email open. By default disabled. If enabled, when receiver will receive this template via email, mailMonk will let you know if they opened the email. All tracking data will be available in the "Logs" tab.
- Subject – Here you can type in the subject of the email. You can use emojis via the emoji button or you can copy paste emojis here. You can also use merge tags to input data from the monday board.
-
Merge tags – When you click on merge tags icon next to the Subject field, it will present you the available columns from your monday board. When you select one, it will add the tag to the subject input field. Do not edit this merge tag but you can change its placement. For example:
Welcome to the team {{name}} can be Welcome {{name}} to the team
Do not remove the curly braces around the merge tag, else it will not work.
Here is the list of supported monday columns that can be added as merge tags:
- status
- date
- text
- file
- numbers
- people
- dropdown
- timeline
- tags
- rating
- vote
- Body of the email – Here you can use the rich text editor or the Visual drag n drop editor to create your email.
-
Add change status button – This will add a button to your email body. Lets see how:
Click on the "Add Change status button" icon to open the the below popup. The icon button is present just above the email body field as shown in the below screenshot.
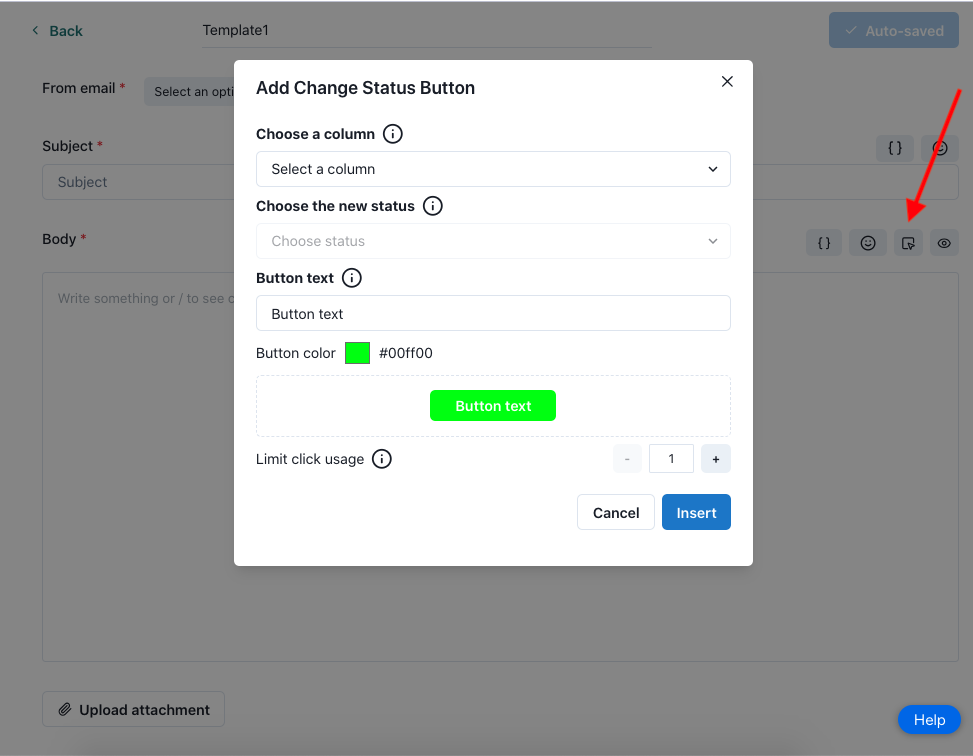
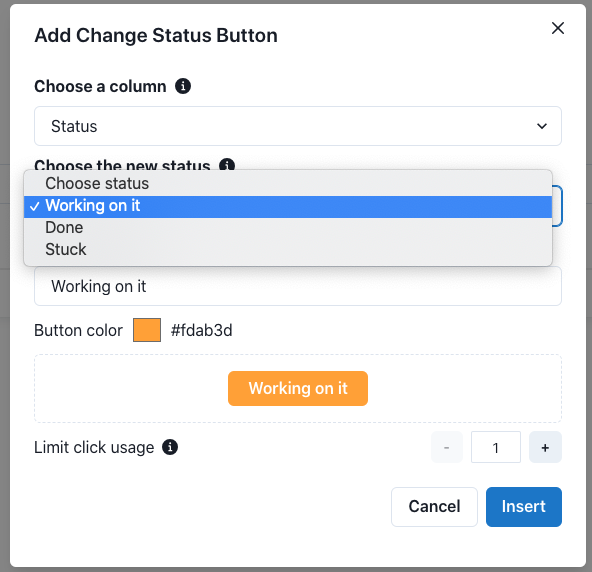
- Choose a column – This is the column in your monday board where you want status to change on click on the button. (User will see the button in their email inbox)
- Choose a new status – This is the new status that you want when user clicks the button from their email inbox.
For example: You are an HR recruter. You sent an email to a candidate and in the email you have a button that says "accept interview". When they click on that, in your monday board, the status will change to Accepted or what ever you have named it.
- Button text – You can customize what text will appear on the button when user views this in their email inbox.
- Button color – You can choose to have a custom color of the button.
- Limit click usage – By default its set to 1. Meaning after 1 click on the button by the email recipient, the further clicks will not be allowed. They can change status once. You can increase this value as per your need.
- Insert button – This button will insert the "Change status button" into the email body.
Now this will insert a button into the email body.
Upload attachment – You can add attachments to your email using this button. The combined attachments size is 20MB per template. This is to ensure that its under the limit supported by gmail and outlook.
Create monday board automation
Before you create an automation, make sure you have atleast 1 active template. Active template meaning, a template must have a sender email added and have a valid subject and body.
To create an automation, click on the "Automation" button in your monday board.

Now click on "Templates" tab and search for mailMonk. Click on mailmonk recipes. You will see the pre-built recipes by mailmonk.
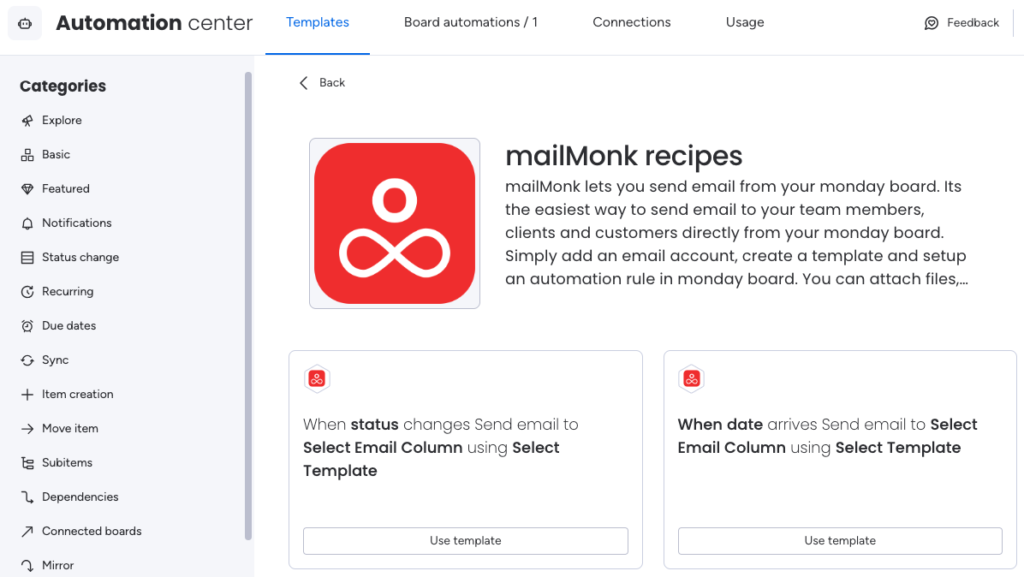
Now choose a recipe. Lets choose "Wehn status changes Send email ...".
Now you will be able to configure the recipe for your board.

- Click on status and you will be able to select any of the status type columns from your board.
- Then click on Select Email Column, this will present you all the columns from board of type Email. Choose one. When automation runs for an item, the email will be sent to the email mentioned in this column for the item.
- Next click on Select Template to choose a template that you own. If you do not own any or you have only inactive templates, then the options for selection will be empty.
- Now click on "Create automation" button to finally create it.
Now go ahead and try to change status of an item in your board. And see the automation triggers and an email is sent to the email address mentioned in the Email column.
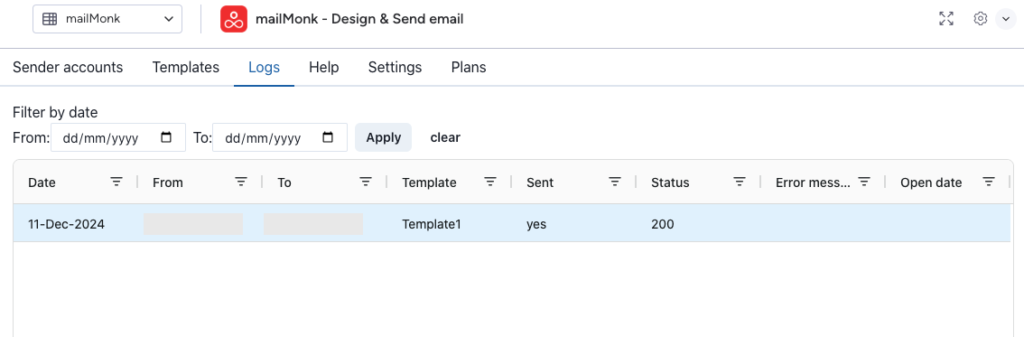
View logs
You can see logs of all sent emails here. These are the emails sent from this board irrespective of which user created the automation or template.
You can filter using various parameters to see the relevant data.
Email Sending & Limits
MailMonk implements limits on the number of emails you can send using the app. These limits align with Gmail's limits and industry best practices.
When you add a sender email to your account, it has a default sending limit of 100 emails per rolling 24-hour period. This means you can send a maximum of 100 emails per sender email. To send more than 100 emails in a day, add more sender emails to your account and use them for your automation needs.
Gmail has a daily sending limit for all accounts, including personal and Google Workspace accounts. Learn more about these limits here: https://support.google.com/a/answer/166852?hl=en
Sending too many emails can negatively impact your email deliverability and increase the risk of your Gmail account being flagged. To avoid this, we recommend sending no more than 100 emails per Gmail account from the MailMonk app. If you use the same sender email across multiple organizations, the total number of emails sent per day across all organizations should be within this limit.